Garden

Thursday, September 27, 2012

Lime ginger crème brulée


We are a part of a supper club which consists of 4 couples and meets every couple months, and the theme for the last one was "Taste of the Orient". I was in charge of dessert and really wanted to make crème brulée, so this version adds a twist to the classic crème by adding the Asian flavour combo of lime and ginger. The flavours were subtle and the dessert was delicious.

Crème brulée is my favourite dessert. It's a creamy, deceptively light little custard that has a satisfying sweet crunch of the burnt sugar done either with a small blowtorch or under the broiler.  The name "crème brulée" is actually a misnomer... we should probably call them "sucres brulée".  I guess it doesn't have the same ring to it... This dessert has gotten a bit of a reputation for being difficult, temperamental shall we say, the diva of desserts.  Cooking custard can be tricky since you have to cook the egg mixture just so, often carefully stirring over a double-boiler until just the right texture which is vaguely described as "coating a spoon".  What does that really mean? Coat a spoon. Anything coats a spoon.  I love this recipe because I don't have to stir and watch and stir some more and try to judge whether the darn cream stuff is coating my spoon only to discover that I basically have a pot of sweet 'n' creamy scrambled eggs, which is what happens if you don't cook it right. This recipe heats the cream, combines the rest of the ingredients and finishes the cooking in the oven in a "bain-marie", or a water bath. Not sure where that name came from, but it means to place your container in water while it cooks, which makes it cook gently and evenly, perfect for diva custard! 

Makes 8 servings
Ingredients:
2 cups heavy cream
6 egg yolks 
1 tsp vanilla
1/4 cup white sugar
Zest from 1 1/2 limes
Juice from 1 lime (squeeze the other half into a glass of water!)
1 tbsp grated ginger
1/2 cup brown/white sugar mix

If you want to go classic, simply omit the lime and ginger.

Directions:
Preheat oven to 350 degrees, and put the kettle on to boil. It's not for tea, just wait and see...
Grate the ginger and lime zest.  


Pour the cream into a medium sized pot and add the vanilla.  Whisk zest and ginger into the cream mixture. Place on medium-high heat until just boiling. When bubbles are forming at the edges, turn off the heat and take the pot off the element. Let sit for 5 min or so to let the flavours meld. 


Meanwhile, whisk together egg yolks and sugar in a bowl.  


Tempering:  This is where it gets fun, but its really the only tricky part. Two things are happening in this step: The first is that you are straining the zest and ginger out of the cream, and the second is that you are tempering the egg so that it doesn't turn to scrambled egg cream.  Which is what will happen if you just dump hot cream into the egg mixture. Do not do this. Capiche?

You may need an extra pair of hands so borrow a friend or relative or rig up something that means you can do it yourself. You basically need to slowly pour some of the hot cream mixture through a strainer into the egg yolk mixture, all while whisking. As, you can see in the photo I clearly got some help since I don't have three hands... Pour in a few tablespoons' worth, whisking well, then pour the rest in slowly while whisking furiously.   


Set 8 ramekins on a deep-set cookie sheet.  Once the mixture is well whisked, pour into individual ramekins, about 2/3 of the way full.


Here is where the boiling water comes in. (No, its not to make crème brulée soup. Gross. Why would you think that?)  Place the pan in the oven and pour the boiling water into the pan until it reaches about halfway up the ramekins. Bake for 20-30 minutes.


They are done when it looks cooked but the middles jiggle slightly when you wiggle the ramekin.  Like how I worked jiggle and wiggle into the same sentence?
Chill in the fridge for a few hours before you are ready to eat. A few minutes before dessert, combine the brown and white sugar in a small bowl. Top each ramekin with a layer of sugars (sorry there is no picture, there were impatient supper-clubers waiting!) and pop under the broiler for 2-3 minutes. When the tops look melted and slightly burnt, remove from under the heat.  Tip: you may need to rotate the pan to burn evenly. Other tip: PUT THE TIMER ON or else you will forget them and they will burn - and not the good kind! You will literally have burnt creams. Not that I'm speaking from experience or anything...


Allow to cool for a couple minutes so your guests don't burn themselves.

Like Amélie, I take great satisfaction in gently cracking the sugar crust with a spoon before scooping up the cream with just enough burnt sugar... mmm I think I have to go make some of this right now.

Enjoy!

Tuesday, September 25, 2012

Chicago-style deep dish pizza


I have actually had real Chicago deep dish pizza. In Chicago. I kid you not it was pretty incredibly delicious.  Take all your favourite pizza toppings and stack them on top of one another and you get deep-dish pizza.  It's literally a pizza pie. Easy-peasy when done in a cast iron frying pan because you can fry all your ingredients, then just roll out the dough, layer the ingredients and pop the whole thing in the oven.  You essentially need about 3 cups of pizza toppings total, but you can use any combination of your favourite ingredients. My brother is an apprentice butcher in Halifax and brought me some amazing bacon that just made this pizza into the legend it was meant to be. Here is what I did. 

Ingredients: 
1 batch of your favourite pizza dough recipe 
1 cup pizza sauce
1 1/2 portobello mushroom cap, cubed
1 onion
1 cup back bacon, cubed (use locally made bacon if you can, it just tastes so much smokier, saltier and just baconier)
1 fresh tomato
1/2 cup old cheddar cheese

Directions: 
First, prep your ingredients. Pre-cook the bacon in the pan, set aside, then brown the onions in the fat (don't let any of that good stuff go to waste), set them aside and throw in the portobello for a quick 5 min cooking. 
Once that is done, let the pan cool while you grate cheese, chop any other veggies you want to use and roll out the dough. Make sure you use a little oil so it doesn't stick to the counter or the rolling pin. 
       

Once its rolled out, gently lift the dough into the oiled pan and shape it as best you can. If the pan is warm it will help the dough to puff slightly. 


I'm a little distracted by a little ball of cuteness tugging at my legs...


She's my girl.


Back to the pizza. Spread 1/2 cup of the sauce in the bottom of the pan.


Add a smattering of the mushrooms and onions...


Then the bacon. Lovely, lovely bacon. 


I decided to make this a double-decker pizza with a bit of pizza dough I had leftover. Roll out a thin sheet of dough to add some dimension to your pizza pie. Pop in the oven for about 10 minutes just to cook it enough so that it's not doughy.


This is to show you that I added tomato before the second layer of dough. It is critical to the structural integrity of the deep-dish pizza. Not really, it just tastes good.


Splatter on the rest of the sauce, then the rest of the ingredients. Don't forget the cheese just because I forgot to take a picture with the cheese!  Then pop the whole thing in the 350 oven for about 20 mins. 


While the pizza is cooking, go play outside. Like we did.


 Be sure to enjoy this bad boy with friends, it's just too good to keep to yourself. And it's way to much pizza for two people to eat safely.


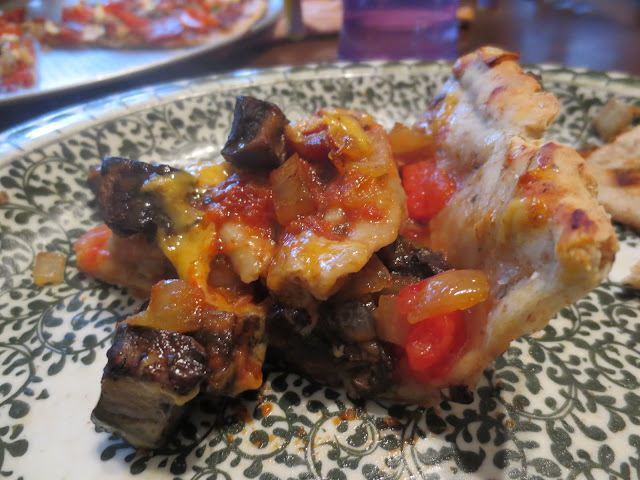
Mmmm.... the smokiness of the bacon somehow permeated the whole thing. It was amazing. I would pay big bucks for this. Good thing I didn't have to. 


Enjoy! And think of Chicago.


Homemade pesto


Basil harvest!
I love basil. Nothing smells like summer to me more than basil. I have several bush-like plants that I am hoping to winter over in the house, but I know it won't fare very well because I don't have a lot of direct sunlight. So I've opted to make pesto.
Pesto is a great way to preserve that lovely flavour for the winter. You can enjoy it on pasta (with sour cream and Parmesan), spread on a sandwich or wrap, or in a soup or casserole to add a pop of flavour.
Traditionally pesto is made with basil, olive oil, garlic, pine nuts and a hard cheese such as parmesan or romano. I used walnuts because they work just as well as pine nuts... (and they're way cheaper).  I used roasted garlic because I prefer a more muted garlic flavour, but if you like that sharp fresh garlic flavour, go for it.                                                                  
Be prepared for what seems like a huge amount of basil to reduce to about 2 cups of pesto.

Ingredients:
7 cups loosely-packed basil leaves
1 cup walnuts, toasted
1 cup grated parmesan cheese
1/2 cup olive oil
2-4 cloves of garlic


Slow-roast the walnuts in a cast-iron pan or in the oven until browned.


Throw the whole lot in the food processor and pulse a few times to get it going then blend until smooth.  Add  more oil if you want a smoother texture. 

Scoop into jars and try not to eat it all at once. 


                                          Cover with a slick of olive oil, it should help prevent browning. 


It will keep in the fridge for a couple weeks, or in the freezer for months. 


Saturday, September 8, 2012

Homemade tomato sauce


 It's tomato season. And I made tomato sauce.  It's something I've always wanted to do. Like skydiving.
Here it is in pictures. It's really not an exact science.
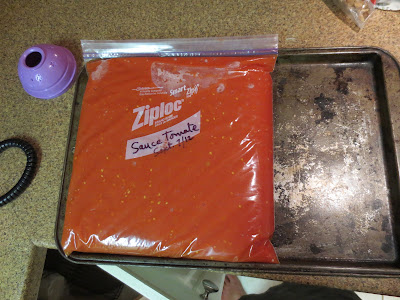
Start with tomatoes, garlic, onions and olive oil. Roast the whole lot, blend and freeze.
(or can if you can. :)

I can't claim these were my garden tomatoes unfortunately. Mine are ripening in a nice gradual way which means I get to enjoy some every day but not in large quantities.


Garlic that my brother grew. I'm so proud.
Drizzle in olive oil and wrap in tin foil. Bake.


 I roasted them at 400 for about 1 hour.  It smelled amazing.


Mmm... roasted garlic. A whole new world has just opened up.


This stuff is going to be great on spaghetti, in chili, lasagna... Mmmm. 


Like how Sophie's toy photobombed that one?